Introduction
Transform humble pears into a taste of autumn magic with this easy-to-follow recipe for homemade pear preserves! It’s the perfect way to capture the delicious flavors of fall and enjoy them all year round. This recipe is as delightful as it is simple, making it ideal for family gatherings or gifting to loved ones. Get ready to savor the sweetness of autumn!
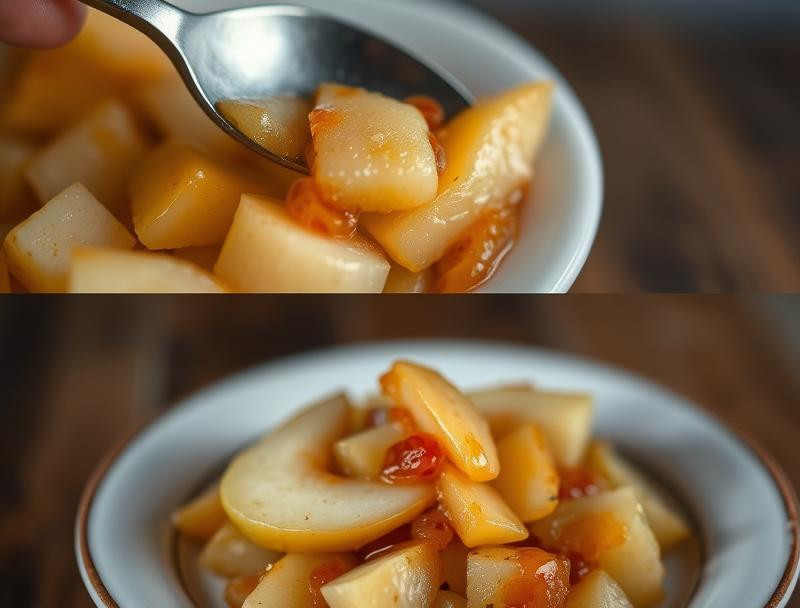
Why This Works
This recipe works because it perfectly balances the natural sweetness of ripe pears with a touch of tartness and spice. The simple method ensures the pears retain their delightful texture, and the preserves have a wonderfully homemade taste that’s far superior to anything store-bought. Plus, it’s incredibly rewarding to create something so delicious and beautiful from scratch!
Key Ingredients
🍐 2 lbs ripe but firm pears, peeled, cored, and chopped
🍋 1 cup lemon juice
砂糖 2 cups granulated sugar
🌟 1 cinnamon stick
🍂 1/2 teaspoon ground nutmeg
Instructions
1️⃣ Prepare the Pears: Peel, core, and chop the pears into roughly 1/2-inch pieces. Try to keep the pieces relatively uniform for even cooking.
2️⃣ Combine Ingredients: In a large, heavy-bottomed saucepan, combine the chopped pears, lemon juice, sugar, cinnamon stick, and nutmeg. Stir gently to ensure everything is well mixed.
3️⃣ Simmer the Mixture: Bring the mixture to a boil over medium-high heat, stirring frequently to prevent sticking. Once boiling, reduce the heat to low and simmer gently for about 45-60 minutes, or until the pears are very tender and the mixture has thickened considerably. Stir occasionally to prevent burning.
4️⃣ Mash (Optional): If you prefer a smoother preserve, use a potato masher to gently mash some of the pears during the last 15 minutes of simmering. Leave some chunks for texture if you prefer.
5️⃣ Sterilize Jars: While the pear mixture simmers, sterilize your jars and lids by washing them in hot, soapy water, rinsing thoroughly, and then placing them in a boiling water bath for 10 minutes. This will help prevent spoilage.
6️⃣ Fill the Jars: Carefully ladle the hot pear preserve into the sterilized jars, leaving about 1/4-inch headspace at the top. Wipe the rims of the jars clean with a damp cloth.
7️⃣ Seal the Jars: Place the lids and rings on the jars, tightening them fingertip-tight. Don’t overtighten.
8️⃣ Process the Jars (Optional): For longer shelf life, you can process the filled jars in a boiling water bath for 10 minutes. This step is optional but recommended for optimal preservation. Follow instructions on your canner if using one.
9️⃣ Cool and Store: Allow the jars to cool completely. You should hear a “pop” sound as the jars seal. Once cooled, check to ensure all jars are properly sealed. Store in a cool, dark, and dry place.
Handy Tips
- Use ripe but firm pears for the best results. Avoid overripe pears, as they may become mushy.
- If you don’t have a heavy-bottomed saucepan, use a large pot and stir frequently to prevent burning.
- A candy thermometer can help you monitor the consistency of the preserves. The mixture should reach a setting point of 220°F (104°C).
Heat Control
Using medium-high heat initially helps to bring the mixture to a boil quickly. Reducing the heat to low ensures gentle simmering, which allows the pears to soften and the flavors to meld without burning.
Crunch Factor
The crunch factor in this recipe is adjustable. Leaving some pear chunks creates a delightful textural contrast with the smooth preserve consistency. Mashing some of the pears creates a smoother, less chunky texture.
Pro Kitchen Tricks
- Add a pinch of cardamom or allspice for a warm, aromatic twist.
- Use brown sugar instead of granulated sugar for a richer, more caramel-like flavor.
- For a quicker process, you can use a food processor to chop the pears.
Storage Tips
Once sealed, your pear preserves can be stored in a cool, dark, and dry place for up to a year. Refrigerate after opening and use within a few weeks.
Gift Packaging Ideas
These homemade pear preserves make a wonderful and thoughtful gift! Present them in pretty jars tied with ribbon and a sprig of rosemary or cinnamon stick. A handwritten tag with the recipe would be a nice touch.
Flavor Variations
🌟 Spiced Pear Preserves: Add 1/4 teaspoon of ground cloves and a pinch of ginger along with the cinnamon and nutmeg.
🌟 Citrus Pear Preserves: Add the zest and juice of one orange or half a grapefruit along with the lemon juice.
🌟 Ginger Pear Preserves: Incorporate 1 tablespoon of finely grated fresh ginger for a zesty kick.
🌟 Apple Pear Preserves: Combine 1 lb of pears with 1 lb of chopped apples for a delightful blend of autumn fruits.
Troubleshooting
- Preserves are too runny: Simmer the mixture for a longer period to allow it to thicken.
- Jars didn’t seal: Ensure the jars and lids were properly sterilized and that the rims were clean before sealing. Check for any imperfections in the jar lids that might prevent a proper seal.
FAQ
- Can I use other types of pears? Yes, you can experiment with different pear varieties. However, choose ripe, but firm pears for the best results.
- How long do the preserves last? Unopened jars can last for up to a year in a cool, dark place. Refrigerate after opening and consume within a few weeks.
- Can I freeze the preserves? Yes, you can freeze the preserves in freezer-safe containers for up to 3 months.
- What can I use pear preserves for? You can use them on toast, biscuits, scones, yogurt, or as a filling for pastries. They also make a lovely addition to cheese boards or to glaze meats like pork tenderloin.
Conclusion
We hope you enjoy making and savoring this delightful autumnal treat! This recipe is a wonderful way to preserve the flavors of fall and share the joy of homemade goodness with your family and friends. Don’t forget to share your creations with us! Happy preserving!